

How to Build a Standing Desk on a Budget
Table of Contents
- What You'll Need: Tools, Materials, and Budget Planning
- Choosing DIY Standing Desk Materials That Work
- Standing Desk Height Guide for Ergonomic Setup
- Step-by-Step Assembly Instructions
- How to Convert a Regular Desk to a Standing Desk
- Budget Standing Desk Converter Options
- Ways to Reduce Material Costs
- Frequently Asked Questions
Last Updated: October 17, 2026
What You'll Need: Tools, Materials, and Budget Planning
Learning how to build a standing desk on a budget is mostly a planning problem: cost and stability come down to choices you make before buying a single bolt. Here is a realistic tool list, an itemized bill of materials for three build tiers, and the trade-offs that separate a $90 desk from a $400 one.

Tools You Actually Need
You can build a fixed-height desk with hand tools, but a drill is worth having since pilot holes prevent splitting and stripped fasteners.
- Drill with 1/8-inch pilot bit and driver bits
- 24-inch or 48-inch bubble level
- Tape measure (25 feet is plenty)
Itemized Bill of Materials by Build Tier
Prices are typical U.S. home-center and lumber-yard ranges as of 2026; sales and regional lumber prices move them by 10-20%.
Tier 1, Fixed-Height Beginner Build (about $90-$140 total)
| Item | Spec | Qty | Est. Cost |
|---|---|---|---|
| Desktop | 3/4-inch sanded plywood, 30 x 48 inches | 1 | $35-$55 |
| Legs | 2 x 4 lumber, 8-foot boards, cut to height | 3 | $12-$18 |
| Apron/bracing | 1 x 4 lumber, 8-foot board | 1 | $6-$10 |
| Fasteners | 2-1/2-inch wood screws, 1 lb box | 1 | $8-$12 |
| Brackets | 4 steel corner braces | 4 | $8-$12 |
| Finish | Sandpaper and one can of polyurethane | 1 | $15-$25 |
| Feet | Felt pads or rubber feet | 1 pack | $5-$8 |
This tier uses a simple trestle-style leg assembly and a plywood top. It is fixed height, so measure carefully before cutting.
Tier 2, Adjustable Crank or Pipe Build (about $180-$300 total)
| Item | Spec | Qty | Est. Cost |
|---|---|---|---|
| Desktop | 3/4-inch plywood or butcher block, 30 x 60 inches | 1 | $50-$110 |
| Frame | Crank-adjustable steel frame or Schedule 40 pipe kit | 1 | $90-$160 |
| Fasteners | Frame-to-top bolts and washers | 1 set | $10-$18 |
| Bracing | Diagonal braces or cross supports | 1 set | $15-$30 |
| Finish | Stain and polyurethane | 1 | $20-$35 |
| Cable management | Clips and a tray | 1 | $10-$20 |
Tier 3, Motorized Budget Build (about $320-$450 total)
| Item | Spec | Qty | Est. Cost |
|---|---|---|---|
| Desktop | Solid wood or butcher block, 30 x 60 inches | 1 | $100-$160 |
| Frame | Entry-level dual-motor adjustable frame | 1 | $180-$260 |
| Fasteners | Included with frame, plus extras | 1 set | $10-$20 |
| Finish | Oil or polyurethane | 1 | $20-$35 |
| Cable management | Under-desk tray and ties | 1 | $15-$25 |
Where the Money Actually Goes
Across all three tiers, the frame and desktop account for roughly 70-80% of the total. Fasteners, finish, and cable management are small but non-negotiable; the wrong screws can split a $60 top.
Fixed-Height vs. Adjustable: The Budget Trade-Off
This decision most affects total cost:
- Fixed height is cheapest and most stable. You commit to standing or add a separate riser for sitting days.
- Crank adjustable costs more but changes height without power, with fewer parts to fail than motorized.
- Motorized is the most expensive and most flexible, but budget motors are slower and have lower weight ratings.
If you are unsure whether you will actually stand, start with a fixed-height build or a converter and upgrade later.
A Simple Budget Worksheet
Before you shop, write down four numbers: total budget, maximum desktop width, target standing height, and weight load (monitor plus equipment plus leaning). Check every purchase against them. If a frame's weight rating is below your load, it is a future replacement, not a budget option.
Choosing DIY Standing Desk Materials That Work
Material choice determines how your desk looks, feels, and performs.

Tabletop and Desktop Options
Your desktop must support monitor weight, keyboard, mouse, and your elbows without sagging.
Plywood is the budget standard: a 3/4-inch sheet costs $40-$60 and holds up to 150 pounds when properly supported.
Solid wood boards run $60-$150 depending on type; oak, pine, and maple look professional and last decades.
Laminate or particle board is cheapest at $20-$40 but sags under weight.
Frame and Support Structure
The frame must be stable, level, and strong enough for your weight leaning on it.
Wood legs cost $20-$40 per pair, with pine the cheapest.
Adjustable height frames run $100-$200; crank-operated frames cost less than motorized ones.
Fixed-height frames cost $40-$80 and work if you commit to standing most of the day.
The frame matters more than the desktop.
Standing Desk Height Guide for Ergonomic Setup
Most ergonomic advice stops at "elbows at 90 degrees." That is a starting point, not a setup. Here are the measurements to take, the order to take them in, and the safety checks to run before you trust the desk with your equipment.

Measure Your Standing Height Correctly
Stand in the shoes you normally wear at your desk. Let your arms hang relaxed, bend your elbows to 90 degrees with forearms parallel to the floor, and measure from the floor to the crease of your elbow.
For most adults this lands between 38 and 48 inches: roughly 40-42 inches under about 5 feet 6 inches, 42-45 inches for 5 feet 6 inches to 6 feet, and 45-48 inches above that. Your elbow measurement wins.
Set the Keyboard and Monitor in Order
Set height from the bottom up, because each piece depends on the one below it.
- Desktop height = your elbow height from the measurement above.
- Keyboard height = desktop height. Wrists should be flat or slightly declined, never bent upward.
- Monitor height = top of the screen at or slightly below eye level, with the center roughly 15-20 degrees below horizontal eye line.
- Viewing distance = 20-26 inches from eyes to screen. If you cannot focus, move the monitor closer rather than leaning in.
Self-check: stand at the desk for 10 minutes. If your shoulders creep toward your ears, the desk is too high. If you hunch forward, it is too low or the monitor is too far away.
Adapt the Dimensions for Different Users
A single fixed height rarely fits two people. If the desk is shared, choose the taller user's height and add a standing mat or platform for the shorter user, or choose an adjustable frame.
For mobility needs, leave at least 30 inches of clear knee space and keep the front edge free of bracing that would block a wheelchair or rollator.
Stability, Load, and Safety Checks Before You Load It
A budget desk earns trust through testing, not looks.
Load rating. Add up everything on the desk, then add a margin for leaning.
Wobble test. Push gently on the front edge and each side.
Tip test. With the desk empty, push sideways near the top.
Level check. Use a bubble level front-to-back and side-to-side, shimming under the legs until both read level.
Fastener check. Re-tighten all bolts after the first week, then every few months.
Once the desk passes these checks, add cable management so cords do not pull on equipment or catch your feet.
Gengar Gaming Desk Mat, 900 × 400mm →
Step-by-Step Assembly Instructions
Preparing Your Workspace and Materials
Clear a large flat surface. Lay out all parts and check against your shopping list; missing one bolt stops everything.
Prepare your desktop:
- Sand all edges smooth on new plywood
- Wipe clean to remove dust
- Apply stain or finish if desired (let dry 24 hours)
Lay out your frame:
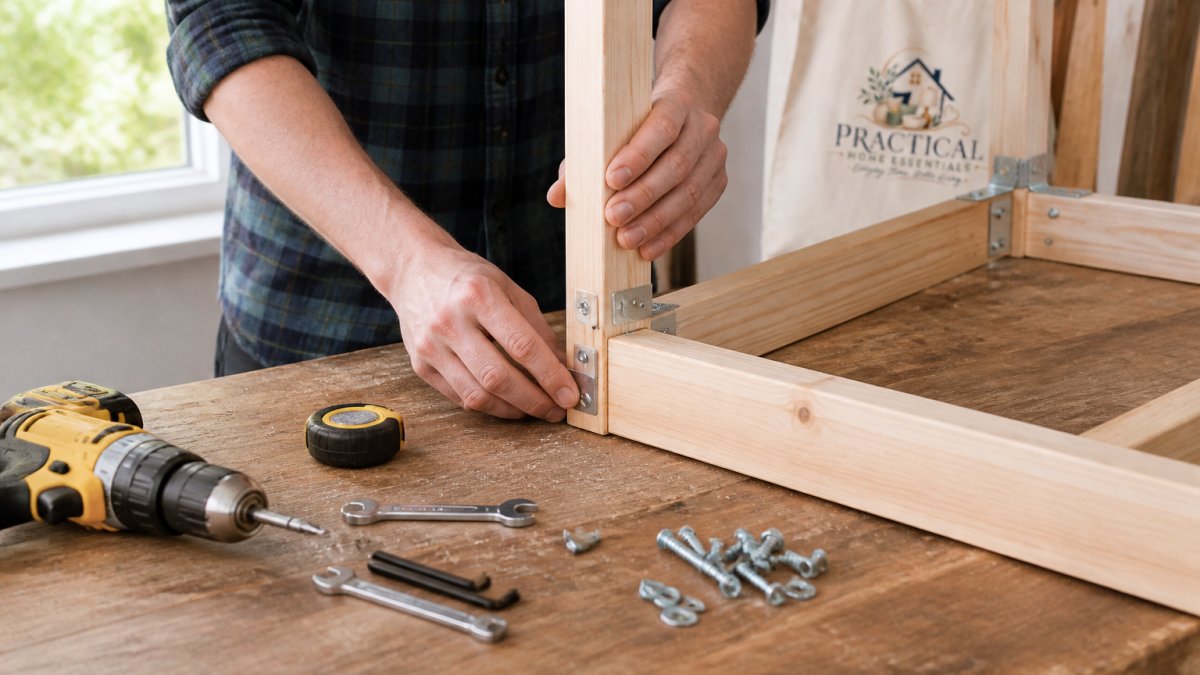
- Assemble frame on the ground first
- Check corners are square using a level
- Tighten all bolts before lifting
Building the Frame and Attaching the Desktop
Start with the frame. Most DIY builds use either pipe legs or wood supports.
For pipe frame:
- Lay out four legs in a rectangle
- Connect them with horizontal pipes at the bottom (usually 4-6 inches high)
- Use pipe fittings (elbows, tees, flanges) to lock joints
For wood frame:
- Cut four legs to height (40-48 inches typically)
- Attach horizontal supports 4-6 inches from the bottom
- Use bolts or lag screws through pilot holes
Now attach the desktop:
- Flip the desktop upside down and position the frame underneath
- Drill pilot holes through frame into desktop
- Fasten with bolts or wood screws
Leave the desktop slightly overhanging (1-2 inches) for comfort.
Testing Stability and Making Adjustments
Before you trust it with your computer, test the desk hard.
Stability check:
- Push down on all four corners (no flex)
- Push sideways on the desktop (no rocking)
- Lean your full weight on it (no wobbling)
Height check:
- Stand at the desk in your normal working position
- Elbows should bend at 90 degrees
- Wrists should be neutral
If it wobbles, tighten all bolts and add diagonal bracing. If it is too high or low, add shims underneath. Once stable, add cable management with zip ties.
How to Convert a Regular Desk to a Standing Desk
Don't have space for a new desk? Convert your existing one.
A standing desk converter sits on top of your current desk and lifts your monitor and keyboard to standing height.
Fixed-height risers cost $40-$80 and stay at one height. Good if you're committed to standing most of the day.
Adjustable converters cost $100-$200 and move up and down so you can alternate between sitting and standing.
To set up a converter:
- Place it on your existing desk
- Adjust height so your elbows are at 90 degrees
- Move your monitor and keyboard to the converter
Budget Standing Desk Converter Options
Fixed-Height Risers vs. Adjustable Converters
Fixed-height risers are the cheapest option at $40-$80. You pick one height and stick with it.
Pros: cheapest, simple and stable, no moving parts to break.
Adjustable converters cost $100-$200 but let you change height throughout the day; crank-operated ones are cheaper than motorized versions.
Pros: adjust height anytime, alternate sitting and standing, better for beginners.
For budget builds, start with a fixed riser if you're committed to standing.
Ways to Reduce Material Costs
Sourcing Reclaimed and Repurposed Materials
The cheapest materials are free materials. Reclaimed wood and salvaged hardware cut costs dramatically.
Where to find free or cheap materials:
- Buy-nothing groups on Facebook
- Craigslist free section
- Construction sites (ask for scrap wood)
Reclaimed materials take more work, but the savings are real: a free pallet desktop saves $40-$60.
Repurposed furniture parts:
- Old filing cabinets become sturdy legs
- Bookshelf supports work as frame components
- Vintage table bases become desk legs
Check measurements before you commit. A free piece that doesn't fit your space is still waste.
Common Mistakes to Avoid
Most budget builds fail because of a few preventable mistakes.
Skimping on the frame. A weak frame wobbles, sags, and eventually fails.
Wrong height. Measure twice, build once.
Skipping the test phase. Assemble everything, test it hard, then adjust before you start working.
Knowing how to build a standing desk on a budget means it is completely doable.
Frequently Asked Questions
How tall should a standing desk be?
Your standing desk height should position your elbows at 90 degrees when your arms hang naturally at your sides. For most adults, this means a desktop height between 28 and 48 inches, depending on your height and whether you're sitting or standing. Measure from the floor to your elbow while standing with arms relaxed, then add 1-2 inches for keyboard thickness. If you plan to alternate between sitting and standing, aim for 40-42 inches as a compromise height.
Is building a standing desk cheaper than buying?
Yes, building a standing desk on a budget typically costs $150-$300, compared to $400-$1,500 for commercial standing desks. A basic fixed-height build using plywood, 2x4 lumber, and metal brackets can be completed for under $200. The savings come from eliminating brand markups and labor costs. However, you'll invest time in assembly and need basic tools, if you value your time highly, a budget converter or entry-level commercial desk may be worth the premium.
What materials do you need to build a budget standing desk?
A basic budget standing desk requires a tabletop (plywood or reclaimed wood), support legs or frame (2x4 lumber or metal pipes), fasteners (screws and bolts), and brackets for stability. You'll also need a saw, drill, level, and measuring tape. Optional but helpful: sandpaper, wood stain or finish, and rubber shims for leveling. Sourcing reclaimed materials from thrift stores or online marketplaces can reduce your total cost to under $150.
Can you turn a regular desk into a standing desk?
Yes, you can convert a regular desk to a standing desk using a riser, converter, or by building a frame extension. A standing desk converter sits on top of your existing desk and raises your monitor and keyboard to standing height, costing $50-$150. Alternatively, build a wooden or metal frame that elevates your desk's height by 12-20 inches. This approach works best if your current desk is sturdy enough to support the extra weight and height stress.